


TECHNICAL SUPPORT


Published 2026-02-26
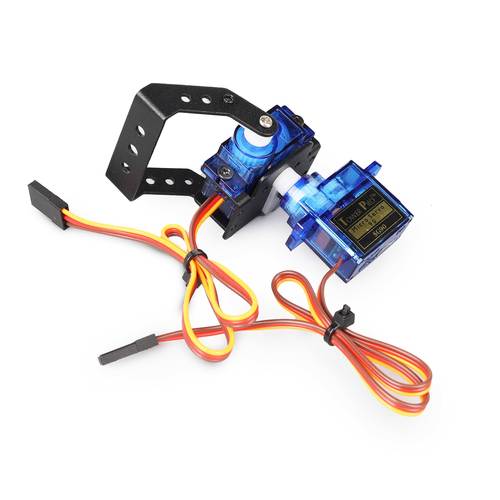
When playing withservogimbals and robotic arms, have you ever encountered problems such as "trembling too much", "insufficient accuracy", "installing them but not knowing how to use them"? Don’t worry, this is a hurdle that almost every newbie will encounter. Today we will put aside those complicated theories and talk in plain English about how to make use of theservogimbal and robotic arm on your hands so that they can really be used by you.
Many friends installed the gimbal for the first time, and when they turned on the power, they found that the screen was shaking like a boat, and they must have felt a little chilled. This is probably not because your servo is broken, but because the basic PID parameters are not adjusted properly. You can think of it like a car suspension. If it's too soft, it will sway; if it's too hard, it will bump. You need to debug the software to find the balance point that makes the gimbal respond both quickly and stably. Usually, you start with a smaller P value. If you feel the response is slow, then increase it slowly until the gimbal can quickly return to normal without shaking.
In addition, looseness in the mechanical structure is also a major culprit of jitter. Check whether every screw on your gimbal is tightened and whether there is a big gap between the servo arm and the bracket. Sometimes, a small shaking will be magnified several times by the end. Adding a little grease to the movable joints or padding a small piece of thin plastic to eliminate empty positions can often bring unexpected stabilizing effects.
Choosing a servo is like fitting tires to a car, it depends on what you want to use it for. If you just want to make a moving model and show some action, then an ordinary plastic gear servo is enough, cheap and affordable. But if you plan to let the robotic arm do some work, such as grabbing a cup or doing simple transportation, then you have to consider a metal gear steering gear. It is stronger, more wear-resistant, and can handle long-term work.
Another key point is to look at the torque and speed of the servo. Don't just look at the seller's "high torque", you have to calculate it based on the length of your robotic arm and the expected weight to grab. Simply put, the longer the arm and the heavier the grip, the more torque is required. If you choose a small one, the robotic arm will either not be able to lift up, or it will shake after being lifted up. Reserve some more torque margin and it will be more comfortable to use.
Putting aside technology, we have to think about what actual fun or value it can bring. The most intuitive thing is to make a visual tracking gadget. Install a camera on the gimbal, and it will automatically recognize and follow human faces or brightly colored objects. It will feel like AI all of a sudden. You can use it to make a small base for smart monitoring, or as a follow-up platform for remote cameras.
By combining the robotic arm with the gimbal, there are even more ways to play. You can use it to make a "tea boy" on the desktop and program it to achieve a fixed sequence of actions. Or install it on a remote control car to make a simple EOD or exploration car, and put a remote control under the sofa. It is like a building block that can help you realize all kinds of fantastic ideas. The key is how you combine and program it.
When assembling, be sure not to tighten the screws all at once. You have to pay attention to the order. First, pre-tighten the screws of each component without tightening them. After all the parts are aligned and the best position is found, gradually tighten them diagonally. This can effectively avoid stress within the structure, make the entire robotic arm move more smoothly, and reduce abnormal noise during operation.
The arrangement of wires also directly affects stability. The wires of the servo are very thin and numerous. If you drag them casually, they can easily get caught or pulled during operation, resulting in poor contact or even signal interference. You can use cable ties or spiral tubes to organize the wiring harness and fix it to the bracket of the robot arm. Reserve enough length of movement to ensure that the wire does not restrict the movement of the joints. This little habit can save you a lot of time troubleshooting.
If this is your first contact, it is recommended to start with the simplest single-axis servo control. Don’t rush to assemble the complete robotic arm. Take a servo and connect it to the control board so that it can turn to the specified angle obediently. This step allows you to familiarize yourself with power supply, wiring and basic control instructions, and build the most basic confidence. Many complex systems start from controlling a single point.
Then you can assemble a two-degree-of-freedom gimbal. This project is very classic and allows you to intuitively understand the collaborative control of horizontal and vertical directions. You can try to write a simple program to let the gimbal automatically sweep back and forth between several fixed points to experience the fun of "shaking your head and shaking your head". Once you have taken this step steadily, you will feel confident when you touch a robotic arm with multiple degrees of freedom.
There are many online resources, but the quality varies. You can first go to Station B or search with keywords such as "servo gimbal production" and "6-degree-of-freedom robotic arm DIY" to see other people's finished product effects and production processes. Videos can give you the most intuitive feeling, knowing which pitfalls others have already tried, and which solutions look more reliable.
If you like a certain plan and want more detailed drawings and codes, you can go to professional forums such as "Maker Carnival" and "DF Maker Community", or search online. Many enthusiastic developers share their full set of materials. Of course, if you want to go more steadily, go directly to the official websites of some brands with technology accumulation. For example, you can search for "Explorer" or "Huaner" to see the open source information and mature suite solutions they provide, which can often get you twice the result with half the effort.
After talking so much, I wonder what is the small project you most want to start now? Is it a gimbal that can automatically track, or a robotic arm that can grab things? Welcome to leave a message in the comment area to share your thoughts, and let’s communicate and make progress together. If you find the article useful, don’t forget to give it a like and share it with more friends who need it!
Update Time:2026-02-26
Contact Kpower's product specialist to recommend suitable motor or gearbox for your product.


