


TECHNICAL SUPPORT


Published 2026-02-27
Friends who play withservocontrol, especially those who are into the M4/3 pit, do you think that theservos (that is,servomotors) on the market are too big and not accurate enough. It looks awkward when installed on your mirrorless stabilizer or small gimbal? Want to make some innovative products, but always get stuck in motor selection? Can't find that "magic device" that is both compact and obedient? Don’t worry, today we will talk about how to find a perfect servo partner for the M4/3 system.
When we usually play photography or tinker with small equipment, the biggest advantage of the M4/3 system is its portability. However, once it comes to the field of automation control, such as making an autofocus slide rail or adding an electric zoom function to the lens, troubles ensue. Ordinary servos are too big, which will make the whole thing top-heavy after installation, and their accuracy is often difficult to meet the standards. When pushing the lens, there will be a situation that makes the picture terrible. This is precisely the biggest headache for many DIY players - they cannot find a precision servo designed specifically for a compact system like M4/3.
In the process of photography and small equipment production, the M4/3 system stands out due to its lightness. But when it comes to automation control, such as building an autofocus slide or configuring an electric zoom for a lens, problems arise. Ordinary servos are too large and destroy the overall balance after installation. They appear top-heavy and have poor accuracy. When pushing the camera, the image shakes seriously and it is impossible to present the ideal visual effect. This dilemma has caused many DIY players to worry because they can never find a precision servo suitable for the M4/3 compact system.
To put it bluntly, when we control the lens, what we want is "smoothness". Think about it, if the delicate damping feeling when manually turning the focus ring can be restored electronically, it would be perfect. High-precision servos, such as those micro servos with gear reduction boxes, can convert the rapid rotation of the motor into a gentle force that pushes the lens focus ring. It's like hiring a "robot" for the lens. The strength and speed are so controlled that the time-lapse video won't have that sudden feeling.
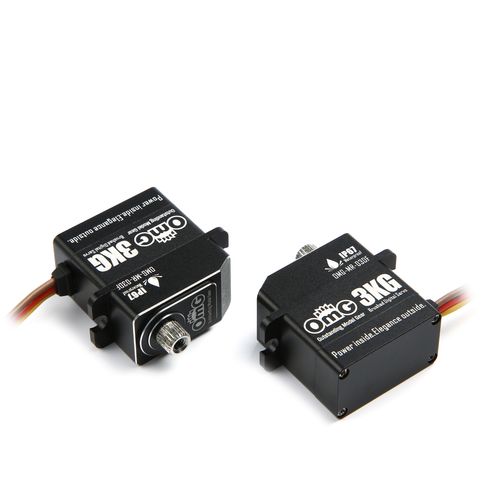
Choosing a servo is like choosing a lens, pay attention to the right one. ️ First of all, you need to pay attention to the size. The M4/3 body is inherently compact. It is best to control the thickness of the selected servo within 10 mm, and the length should not exceed 30 mm, so that it can be smoothly inserted into your DIY case. ️ Next, look at the torque. Don’t be fooled by those big parameters. It doesn’t actually require much effort to push the lens focus ring. A torque of 1 to 2 kg/cm is enough. Excessive torque can easily cause the servo to burn out or the lens to break. ️ Finally, considering the control method, digital servos generally respond more quickly and position more accurately than analog servos, so they are definitely the first choice.
In fact, it is not difficult to add a servo to an M4/3 lens yourself. First of all, you need to buy a suitable servo bracket. If there is no suitable one, you can also use a 3D printer to design one yourself. Make sure it can be firmly fixed under the lens or on the side.
The second step is the key. Make a connecting piece. One end of the connecting piece is fixed on the steering wheel of the servo, and the other end uses a rubber ring or a 3D printed gear ring to fit on the focus ring or zoom ring of the lens. The third step is to connect the servo to the control board (for example), run a simple program to test the rotation angle, and adjust the physical position to ensure that it rotates smoothly and without lag.
After the hardware installation is completed, software parameter adjustment becomes the key. Many friends have reported that the servo vibrates, which is generally due to the incorrect frequency setting of the control signal. At this time, you can try to increase the frequency of the PWM signal appropriately, for example, setting it to above 300Hz, which can effectively reduce the jitter perceptible to the naked eye.
In addition, the stroke of the servo also needs to be accurately limited, and it must be prevented from being pushed excessively to avoid damaging the mechanical structure inside the lens. You can first manually rotate the lens to determine the starting point and end point of the focus stroke, and then strictly limit the rotation range of the servo to this range in the program.
This carefully modified "servo lens" has rich and colorful gameplay. For those who are keen on taking macro shots, they can use it to perform autofocus bracketing operations. Specifically, by writing a program, the servo drives the focus ring to move in tiny steps, and then in the later stage, a photo with a clear picture is synthesized.
And for those who are engaged in time-lapse photography, it is an indispensable tool. When used with a slide rail, the servo can change the focus simultaneously while the camera is moving. In this way, a "Hitchcockian" zoom effect can be easily achieved. You can even use it to create a remotely controlled pan/tilt, and you can remotely control and adjust the focus of the camera just by sitting in front of your computer.
Although DIY is a lot of fun, there are a few things I have to remind you. First, there are risks in lens modification, especially those expensive M4/3 lenses. Once they are disassembled or external force is applied, the warranty qualification is likely to be lost, and its internal optical structure is also very likely to be affected. So it is recommended that you use a cheaper manual lens to practice the operation first. Secondly, there is a problem with the power supply. The servo requires a lot of current when working. Never plug it directly into the USB port of the camera to draw power. It is best to use a separate battery to power the servo and the control board. This can ensure that both the camera and the servo can work stably.
After talking so much, I wonder if you have any new creative inspiration in your mind? If you were engaged in product innovation, would you consider integrating this micro-servo into the next generation of M4/3 accessories? Welcome to chat about your thoughts in the comment area. If you find it useful, don’t forget to like and share it so that more friends who play M4/3 can see it!
Update Time:2026-02-27
Contact Kpower's product specialist to recommend suitable motor or gearbox for your product.


