


TECHNICAL SUPPORT


Published 2026-03-11
When we are doing product innovation, robots, or intelligent hardware, we often encounter a daunting problem: If you want to find a small but powerful steering gear, how should you choose it? There are so many models on the market, and the parameter list is like a bible. If you accidentally buy it, it will either fail to install, or the torque is not enough, and the project will be stuck there. Not to mention it will be troublesome. Today we will talk about the micro metalservo(Sub Micro RC) to help you sort out this problem.
Let’s solve the most practical problem first: how to judge whether the torque is enough. Many people get confused when they look at the parameters. What are kg·cm and oz·in? In fact, they are not that complicated. Just remember a stupid way: if it is used on the rudder surface of a model aircraft, taking into account the length of the rudder arm, generally speaking, a torque of about 1kg·cm is more than enough to handle the joints of a palm-sized small aircraft or a small robot.
To judge whether it is enough or not, you have to look at how heavy your items are. For example, when making a small desktop-level robotic arm, the heavier the part that needs to be lifted by each joint, the greater the torque required. My personal experience is that if the budget allows, try to choose a larger one, because the torque is like a deposit, which is usually enough, but in critical moments (such as when the robot gets stuck and requires more force to break free), the more torque, the more insurance you will get.
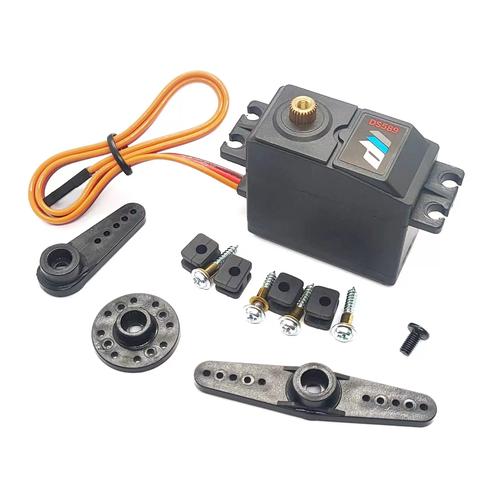
This is the most frequently asked question by novice friends, and it is also a big pitfall. Plastic gearservos (nylon gears) are cheap and have low noise. However, if they are used in places where the force is slightly greater, such as the legs of a robot dog, it is common for the gears to be damaged (that is, the gears are broken). I have disabled several of them myself, a bloody lesson.
Metal-toothed servos are much more durable, especially when used in scenarios that require frequent rotation and stress. Of course, it also has disadvantages, such as it is more expensive, the gear gap may be slightly larger than precision plastic teeth, and if it is blocked, it is easy to burn the circuit. But generally speaking, for those who have product innovation needs, in order to save worry, metal teeth are the first choice, which can help you save a lot of trouble in later maintenance.
Many friends cannot tell the difference between analog and digital when looking at the product introduction. In fact, the main difference between them lies in the control chip and working method. To put it simply, the analog servo receives a signal and moves, which is more "original"; while the digital servo responds faster because after receiving the signal, it processes it at a higher frequency, and the response is almost without delay.
The direct benefit of this is that the positioning of the digital servo is more accurate and stable, especially when making delicate movements, such as making the robot walk smoothly, the digital servo can do it smoothly. If you are only doing simple switching actions, such as controlling the opening and closing of a hatch, analog servos are enough; but if it involves complex action programming, it is recommended to use digital servos directly to avoid having to deal with accuracy issues later.
Lack of accuracy is the biggest headache when playing with servos. You obviously want to turn it 90 degrees, but it turns it to 93 degrees for you. In precision assembly or bionic robot movements, everything is almost lost. In fact, accuracy not only depends on the servo itself, but also has a lot to do with the power supply.
If the voltage is unstable, the servo will vibrate and make you laugh. Therefore, the first step is to ensure that the power supply is sufficient. It is best to use a voltage stabilizing module to supply power separately. The second step is to perform filtering in the program to filter out small malfunctions of the joystick or sensor. Finally, and something that is easily overlooked, the neutral point of the servo (that is, its mechanical zero point) is sometimes not the most accurate when shipped from the factory. You can find the most accurate position through programming fine-tuning. After these few steps, the accuracy can obviously reach a higher level.
Choosing a servo without looking at the voltage is like driving without looking at the fuel gauge. Sooner or later you will have to lie down. Micro servos usually have an operating voltage range, such as 4.8V to 6.0V, and some high-voltage ones can reach 7.4V or even 8.4V. The key is that the higher the voltage, the faster the speed and the greater the torque, but the faster it heats up.
You have to look at your main control board and battery power supply. If you use a 2S lithium battery (7.4V), but choose a servo with a maximum of 6V, you have to add a step-down module, otherwise it will burn out in one second. On the other hand, if your battery is only 5V and you choose a high-voltage servo, it will always be in a "half-starved" state and cannot produce torque. The most worry-free way is to match your battery voltage, servo operating voltage and ESC (or voltage step-down board). Take a look at the parameter list before making a choice. Don’t take it for granted.
If you play too much, you will definitely encounter a servo strike. Don’t panic. Check in order. Most problems can be solved by yourself. The first step is to listen to the sound. If the servo makes a "buzzing" sound but does not turn after powering on, it is most likely that the rotor is blocked or the gear is stuck. Manually help it move, or disassemble it to see if there are any foreign objects.
The second step is to smell it. If a burning smell wafts out, it's probably because the motor or driver chip inside is burned out, and the only option is to replace it with a new one. The third step, and the most common, is to check the signal line. The servo wire is thin and easy to break when folded back and forth, especially at the base of the plug. Use a multimeter to test it, or try another wire. Many times one wire is broken, making you think that the servo is broken and throw it away. Don’t ask me how I know, I’ve thrown dozens of them.
After talking so much, I wonder if the most troublesome thing for you when using a micro servo is accuracy or durability? Or do you have any unique debugging tips? Welcome to share it in the comment area, let's communicate together, and give it a like, so that more friends who play servos can see this article and avoid detours!
Update Time:2026-03-11
Contact Kpower's product specialist to recommend suitable motor or gearbox for your product.


