


TECHNICAL SUPPORT


Published 2026-02-26
Have you ever encountered such a scenario: you have worked so hard to set up aservocontrol system, but you have to manually press buttons or type on the keyboard every time you control it, which is not "smart" at all? I want to add some voice control to make the device understand human speech, but I am worried that the technical threshold is too high and the code is too complicated, so I don’t know where to start. In fact, using Raspberry Pi to add voice recognition to theservois much simpler than imagined, and the cost is not high.
The biggest charm of voice-controlled servos is that it turns "hands on" into "words". Imagine you make a smart trash can that automatically opens the lid without stepping on it or waving your hands; or you make a creative robotic arm that performs grabbing actions when you say "grab". For product innovation, this can give your work an instant "soul" and a full sense of interactivity.
️ One of the most commonly used scenarios is smart home gadgets. For example, if you make an automatic window closer, you can lie in bed on a rainy day and say "close the window" to it, and the window will close by itself. Isn't it great? Voice control frees both hands and makes these DIY works closer to our daily usage habits.
️ Another typical application is interactive teaching and display models. When teachers or makers are doing science popularization, they can use voice to control a robot camera that can turn its head, or a simulated radar that can change directions according to instructions. The effect is definitely much cooler than simply using a program to demonstrate, and it can catch the audience's attention at once.
Choosing the right hardware is half the success of your project. As for Raspberry Pi, if you are a novice, Raspberry Pi 4B is highly recommended. It has sufficient performance and there are many online tutorials. If you just want to control one or two servos, the Raspberry Pi Zero 2W is enough, smaller and cheaper. The key is to have Wi-Fi capability, because many voice recognition services require an Internet connection.
️ The choice of servo depends on your specific use. Small toy servos (such as SG90) have low power but are cheap and suitable for small models. If you want to make a robotic arm or need to drive a certain load, you have to choose a high-torque servo with metal gears (for example). Remember to check the working voltage of the servo. Do not directly connect it to the 5V of the Raspberry Pi to draw power. It is easy to burn the board. It is best to use an external power supply.
There are two main ways to install "ears" and "brains" on a Raspberry Pi. One is a local offline solution, using open source libraries such as. The advantage is that it does not cost money, does not rely on the Internet, and has good privacy. However, the recognition accuracy is average, especially not friendly to Chinese, and it is suitable for simple scenarios with very few command words.
️ The other one is the cloud API solution, which is also the most mainstream method with the best experience at present. Baidu, Alibaba, Tencent and iFlytek all provide free speech recognition interfaces. The Raspberry Pi sends the recorded sound to the cloud, and the server analyzes the text and sends it back. The recognition rate is very high. Although it requires an Internet connection, Wi-Fi is now everywhere, and this price is completely acceptable.
The control core of the steering gear is PWM (Pulse Width Modulation). A simple understanding is to send a specific regular pulse signal to the steering gear to tell it which angle to turn. The Raspberry Pi itself has hardware PWM pins, but it is more convenient to use software simulation libraries, such asRPi.GPIOor more powerful .
️ During specific operation, you need to first determine the pulse width corresponding to the neutral point of the servo (usually 90 degrees), and then calculate the width range corresponding to 0 degrees and 180 degrees. For example, the servo receives a signal every 20ms, and the high-level time is between 0.5ms and 2.5ms, corresponding to 0 degrees to 180 degrees. In the code, you calculate the pulse width based on the angle you want to turn, and then continuously output this signal.
The core code logic of the entire process is actually very clear, just like a "dictation-translation-execution" chain. The Raspberry Pi first uses the microphone to record your instructions, such as "turn left." Then call the speech recognition API to convert it into the text "Turn left". Then the program determines the text. If it is "turn left", it calls the function that controls the servo and sets the angle parameter to 30 degrees.
️ Here is a little trick. In order to improve the recognition rate, you can set a keyword list in the code, such as["Open", "Close", "Turn left", "Turn right"]. After the program gets the text from the cloud, it first matches the words in this list. If there is a match, then perform the action. This can prevent some irrelevant noise from being mistakenly recognized as instructions and make your system more "obedient".
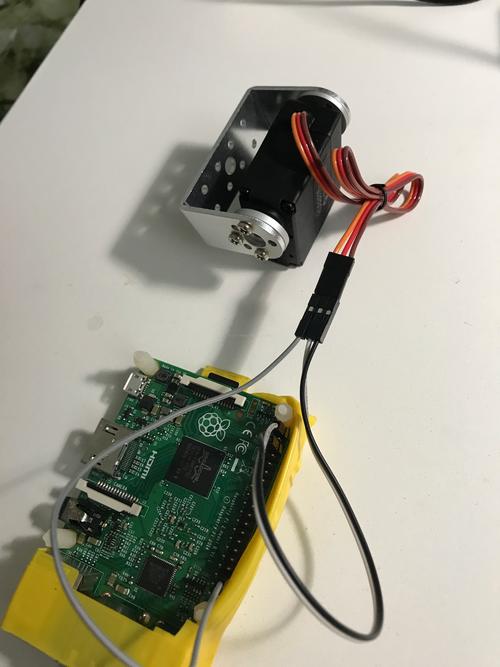
You will definitely encounter various pitfalls when doing it for the first time, so don’t panic. The most common problem is that the servo doesn't turn. Check the power supply first! The current of the servo is very large when it is activated. If the power supply of the Raspberry Pi is insufficient, it will cause the system to restart. Be sure to use an external power supply to power the servo separately, and connect the ground wire of the Raspberry Pi and the servo together. A common ground is very important.
️ If the servo keeps shaking or turns to a strange angle, it is usually because the PWM signal is unstable or the pulse width calculation is incorrect. Try itlibrary, its PWM is very stable. Also, the voice recognition does not respond. First, confirm whether the microphone is recognized on the Raspberry Pi. You can useOrder to record a piece of audio and listen to it. If you check it step by step, the problem can always be solved.
After reading so much, are you itching to try it? What is the biggest problem you encounter when working on a steering gear project? Is it code debugging or hardware connection? Welcome to share your experience in the comment area, let's communicate together. If you find this article useful to you, don’t forget to like it and share it with more friends!
Update Time:2026-02-26
Contact Kpower's product specialist to recommend suitable motor or gearbox for your product.


