Home Support 12 Bit PWM Servo Motor Driver
TECHNICAL SUPPORT

Product Support

Catalogue

Resources for Engineers
Servo
What’s a Servo Motor, Anyway? Servo motors are the unsung heroes of precise motion. Unlike regular motors that spin freely, servos rotate to specific angles (typically 0–180 degrees) based on electrical signals. The MG995 stands out for its torque (10 kg/cm!) and metal gears, making it ideal for heavy-duty tasks like robotic arms or steering mechanisms. But none of that matters if you can’t wire it correctly. The Three Wires That Rule the World Pop open the MG995’s connector, and you’ll find three wires: Brown (Ground): The foundation. Connect this to your circuit’s ground. Red (Power): The lifeblood. Requires 4.8–7.2V—usually a 5V supply. Orange/Yellow (Signal): The conductor’s baton. This wire listens for PWM (Pulse Width Modulation) signals to determine position. But here’s where beginners stumble: voltage isn’t negotiable. Use a weak power supply, and the servo jitters. Overpower it, and you’ll smell regret. A 5V/2A adapter or a dedicated battery pack (like a 6V NiMH) is your safest bet. The PWM Secret Sauce The MG995’s brain responds to PWM pulses sent to the signal wire. Here’s the cheat code: 1 ms pulse: 0 degrees (full left) 1.5 ms pulse: 90 degrees (neutral) 2 ms pulse: 180 degrees (full right) These pulses repeat every 20 ms (50 Hz frequency). Think of it like a metronome for motion—each beat tells the servo where to snap. Wiring to Microcontrollers: Arduino Example Let’s get hands-on. Wiring the MG995 to an Arduino Uno? Easy: Brown wire → GND pin Red wire → 5V pin (or external power) Orange wire → Digital PWM pin (e.g., D9) But here’s a pro tip: Don’t power the servo through the Arduino’s 5V pin. The MG995 can draw up to 1.2A under load, which fries most boards. Use an external supply and share the ground. ```cpp include Servo myServo; void setup() { myServo.attach(9); // Signal pin on D9 } void loop() { myServo.write(90); // Neutral position delay(1000); myServo.write(180); // Full right delay(1000); } ### Why Bother With the Pinout? Glad you asked. Miswiring leads to: - Jittery movement: Weak power or noisy signals. - Overheating: Incorrect voltage or blocked movement. - Silent death: Reversed polarity (brown/red swapped). Master the pinout, and you’ll dodge these pitfalls like Neo in *The Matrix*. From Theory to Triumph—Real-World Applications Now that you’ve nailed the MG995’s pinout, let’s turn knowledge into action. This servo isn’t just for hobbyists; it’s a workhorse in industrial prototypes, animatronics, and even camera gimbals. ### Case Study: Robotic Arm for Pick-and-Place Imagine building a robotic arm to sort objects. You’d need: - 2–4 MG995 servos (for joints/gripper) - Arduino/Raspberry Pi - External 6V battery pack Wiring Strategy: - Daisy-chain ground/power wires to a common supply. - Dedicate separate PWM pins for each servo. But here’s the catch: *Multiple servos = power-hungry beasts*. A 6V/3A supply ensures smooth operation. ### Raspberry Pi Integration The Pi’s GPIO pins can’t natively output PWM signals. Solution: Use Python’s `RPi.GPIO` library for software PWM or a hardware PCA9685 module for precision. python import RPi.GPIO as GPIO import time GPIO.setmode(GPIO.BCM) SIGNAL_PIN = 18 GPIO.setup(SIGNALPIN, GPIO.OUT) pwm = GPIO.PWM(SIGNALPIN, 50) # 50 Hz def set_angle(angle): duty = (angle / 18) + 2 pwm.ChangeDutyCycle(duty) pwm.start(0) set_angle(90) # Neutral time.sleep(2) pwm.stop() GPIO.cleanup() ``` Troubleshooting 101 Problem: Servo doesn’t move. Fix: Check connections with a multimeter. Is the signal wire sending pulses? Use an oscilloscope or LED test circuit. Problem: Servo buzzes at rest. Fix: Add a 100µF capacitor across power/ground to smooth voltage spikes. Problem: Limited range of motion. Fix: Calibrate PWM pulse widths in code. Some servos respond to 0.5–2.5 ms pulses for extended range. Pushing Boundaries: Modding the MG995 Daredevils often hack servos for continuous rotation: Remove the physical stop block inside. Disconnect the potentiometer feedback. Rewire for 360-degree spinning (now it’s a gearmotor!). But be warned: This voids warranties and requires soldering finesse. Final Thoughts The MG995’s pinout is your gateway to mechanical wizardry. Whether you’re building a solar tracker or a Halloween animatronic, understanding those three wires transforms you from a button-pusher to a creator. Now go forth and make something that moves—literally.
Technical Insights
Micro Servo

12 Bit PWM Servo Motor Driver

Published 2025-09-03

Precision Meets Power: The KPOWER 12-Bit PWM Servo Motor Driver You’ve Been Waiting For

Let’s talk about control. Not the kind you lose when your coffee spills, but the kind that makes machines move with surgical accuracy. Imagine a device that turns jittery, unreliable motion into something smooth—like butter on a hot skillet. That’s the KPOWER 12-bit PWM servo motor driver. It’s not just another component; it’s the quiet hero in systems where precision isn’t optional.

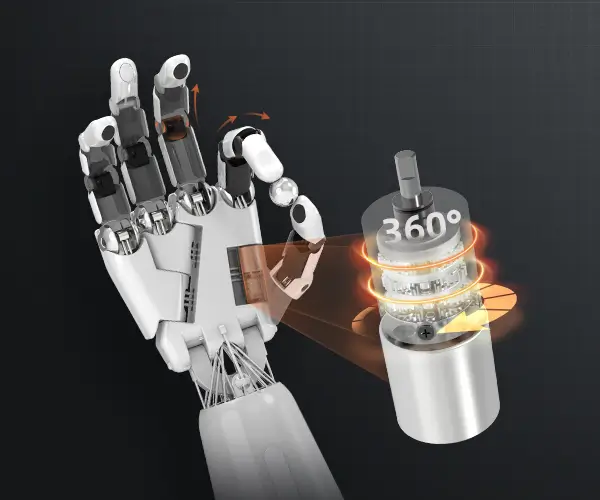
“Why 12 bits?” Glad you asked. Most drivers cap out at 8 or 10 bits, which is like trying to paint a sunset with only six colors. With 4,096 discrete steps of control, the KPOWER driver nails nuances others miss. Need a robotic arm to position a microchip? Or a camera gimbal to stay steady on a bumpy road? This thing doesn’t just “work.” It performs.

But Wait—What About Real-World Chaos? A user once asked, “What happens if my setup faces voltage spikes or EMI interference?” Fair concern. The answer? KPOWER’s adaptive filtering tech laughs in the face of noise. It’s like having a bouncer for your signal integrity, kicking out unwanted disruptions before they crash the party. No hiccups. No drama.

Here’s the kicker: This driver doesn’t hog energy like a weekend DIY project. It sips power, thanks to a smart switching design that balances efficiency and torque. Think of it as the hybrid car of motor drivers—eco-friendly without sacrificing horsepower.

“Is it user-friendly?” Let’s put it this way: If you’ve ever struggled with cryptic setup manuals, you’ll appreciate KPOWER’s plug-and-play ethos. No PhD required. Connect. Configure. Go. And if you’re a tinkerer? The open-loop customization options are your playground.

Durability? Oh, It’s Overengineered. We’re talking about a unit that thrives in environments others avoid. Dusty warehouses? Humid greenhouses? Sub-zero storage facilities? It’s not just “rated” for these conditions—it’s built to outlast them. The aluminum alloy casing isn’t just for looks; it’s a beast, keeping temps stable even during marathon sessions.

Still on the fence? Consider this: KPOWER’s 12-bit driver isn’t chasing trends. It’s setting them. From automated agriculture to precision medical devices, it’s the unspoken backbone of systems that can’t afford to fail.

So, what’s the takeaway? If you’re tired of “good enough” and ready for “exactly right,” this driver isn’t an upgrade. It’s a revelation. And hey, isn’t it time your projects had one?

Update Time:2025-09-03

Powering The Future

Contact Kpower's product specialist to recommend suitable motor or gearbox for your product.

Mail to Kpower
Submit Inquiry
WhatsApp Message
+86 180 0277 7165
 
kpowerMap